Assigning Payments to Entries
Payment settlement, that is, the association between entries and payments, can take place in various ways: automatic settlement using a unique criterion and through data comparison when retrieving bank data, automatic settlement on bank statement items, or manual individual settlement. Consequently, managing settlements may involve the following tasks:
- Retrieving bank data
- Manually starting the automatic settlement on bank statement items
- Reviewing the settlement results after automatic settlement operations
- Manually settling individual entries
Settlement or payment matching?
Make sure not to confuse settlement with payment matching.
- Settlement
- Settlement is the mechanism for effectively associating payments with entries using entry items.
- Payment matching
- Payment matching is the operation that compares bank statement items or payments with entries using customizable matching configurations. After successful matching, JustOn Cash Management can complete the actual settlement.
Retrieving Bank Data
Note
Make sure that the Bank Statements tab is displayed (see Adapting Navigation Bar), and that the button Retrieve is available on the Bank Statement list view (see Enabling Bank Statement Download).
You can retrieve banking transactions from the bank accounts subject to a specific EBICS bank account credential in the status Active for a specific period.
- Open the Bank Statements tab.
- Click Retrieve.
-
Select the relevant EBICS bank account credential and define the period for which you want to retrieve the transactions.
JustOn Cash Management can retrieve banking data up to the day before the current date.
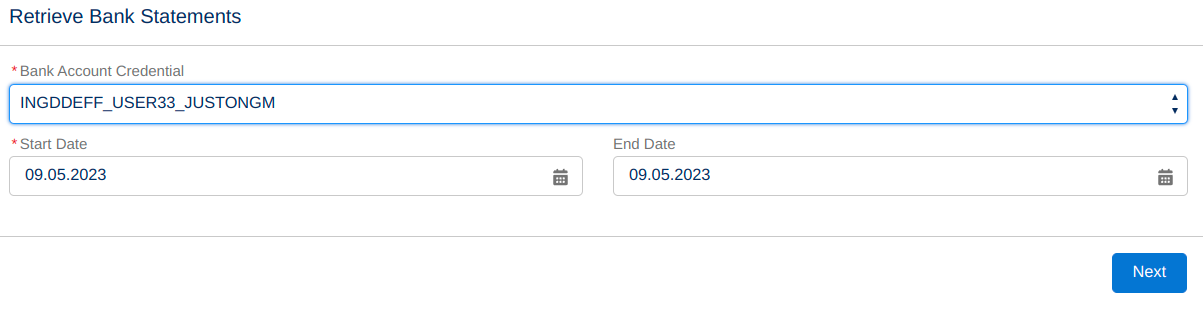
Configuring bank statement retrieval -
Click Next.
This retrieves the banking transactions for the bank accounts subject to the selected EBICS bank account credential and the specified period from the bank. As part of the data retrieval, JustOn Cash Management automatically associates existing payment records (as related to entries) and refund records with matching bank statement items according to an end-to-end ID and retrieved bank statement items (and corresponding new payment records) with matching entries through data comparison.
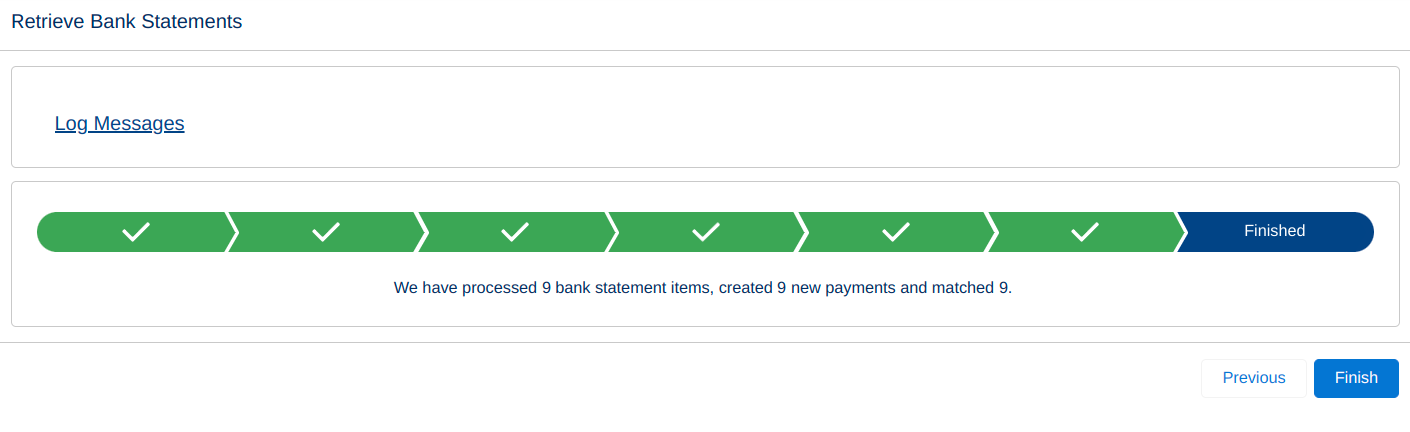
Bank statement retrieval confirmationClicking Finish returns you to the downloaded bank statements on the Bank Statements tab.
-
Review the matching and settlement results.
For details, see Reviewing Automatic Settlement Results.
Info
As part of the data retrieval, JustOn Cash Management automatically associates
- existing payment records (as related to entries) and refund records with matching bank statement items (from the original bank account and according to the end-to-end ID), or
- retrieved bank statement items (and corresponding new payment records) with matching entries through data comparison based on active matching configurations.
Matching and settlement results
Settlement operations can produce various results – as kept in the field Matching Result on payments and bank statement items. According to the outcome, users may need to take additional action.
| Matching Result | Description |
|---|---|
Account matched |
JustOn Cash Management has found a matching account, but has not completed the settlement. A user must proceed to manually settle the payment. |
Entry matched |
JustOn Cash Management has found a matching entry, but has not completed the settlement. A user must proceed to manually settle the payment. |
Manually settled |
A user has settled the payment manually. |
Settled by Payment Id |
JustOn Cash Management has completed the settlement based on a matching unique ID. |
Settled by automatic match |
JustOn Cash Management has completed the settlement through data comparison based on active matching configurations. |
Unmatched |
JustOn Cash Management has not found any matching data. A user must review the matching configurations and repeat the automatic settlement, or proceed to manually settle the payment. |
Unmatched, multiple results |
JustOn Cash Management has found multiple possible matches for different accounts or business entities. A user must review the matching configurations and repeat the automatic settlement, or proceed to manually settle the payment. |
Refund Id matched |
JustOn Cash Management has found a matching refund based on a unique ID. |
With the matching results Unmatched or Unmatched, multiple results, the processing log (as saved in the Payment field Matching Records) may indicate troubleshooting information.
- The message
No matching results foundindicates that none of the available matching configurations can extract data to be processed from the available bank statement items. That is, the (regular expression-based) input string filter provided as parser configuration does not retrieve data for the intended comparison from theReferencefield of the bank statement item. In this case, review the input string filter as part of the matching configuration. You can use tools like, for example, regex101 to define and test your regular expressions. - An applied matching configuration may return
"number-of-results" : 0for an entry match or account match. This indicates that the input string filter has extracted usable data from the bank statement item, but the data comparison with entries or accounts does not produce a result. In this case, review the processing log in the Payment fieldMatching Records. The recorded comparison data may indicate why the comparison has not found matching entries or accounts. If you are not able to find and correct the error, do not hesitate to contact JustOn Support.
Starting Automatic Settlement on Bank Statement Items
Some use cases may require to trigger the automatic settlement manually – for example, if your business imports banking data via CSV files, creating bank statements and bank statement items without bank integration.
As part of the settlement process, JustOn Cash Management associates
- bank statement items with matching payment records (as related to entries) and refund records according to an end-to-end ID, or
- bank statement items (and corresponding new payment records) with matching entries through data comparison based on active matching configurations.
Automatic settlement is possible for bank statement items that either do not have related payments or whose related payments are not associated with entries (via entry items).
Note
Make sure that
- the button Settle Automatically is available on the Bank Statement Item list view, see Enabling Settlement From Bank Statement Items
- there are active matching configurations, see Configuring Payment Matching
To trigger the automatic settlement process:
- Open the Bank Statement Items tab.
-
Filter the list view or select the bank statement items to be processed.
Continuing without selection includes all listed bank statement items.
-
Click Settle Automatically.
This displays the number of bank statement items to be processed.

-
Click Next.
This starts the automatic settlement process. The page shows the job progress and log messages.
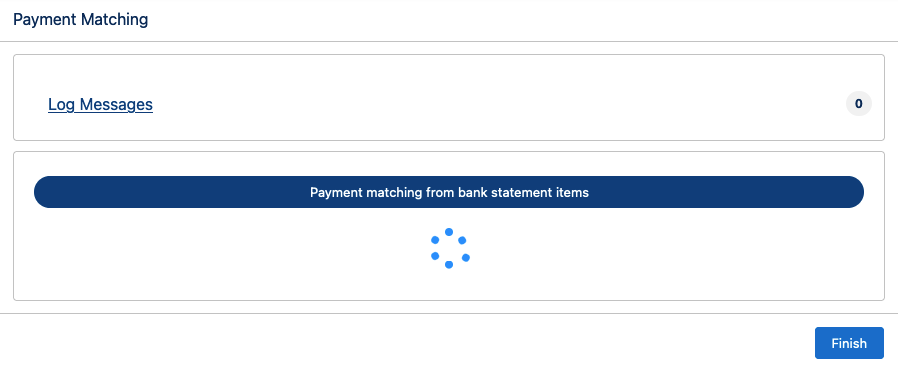
Clicking Finish returns you to the Bank Statement Items tab.
-
Review the matching and settlement results.
For details, see Reviewing Automatic Settlement Results.
Reviewing Automatic Settlement Results
Automatic settlement operations can produce various results – as kept in the field Matching Result on payments as produced from bank statement items. According to the outcome, users may need to take additional action.
To review the result of automatic settlement operations:
-
Open the Payments tab, and select the list view Unassigned Payments or Unassigned Payouts.
This displays the payments that have not been automatically assigned to entries.
-
Open the payment to review.
-
Review the value in the field
Matching Result, and determine the next steps.Matching Result Description Next Steps Account matchedJustOn Cash Management has found a matching account, but has not completed the settlement. Proceed to manually settle the payment. UnmatchedJustOn Cash Management has not found any matching data. Review the matching configurations and repeat the automatic settlement, or proceed to manually settle the payment. Unmatched, multiple resultsJustOn Cash Management has found multiple possible matches for different accounts or business entities. Review the matching configurations and repeat the automatic settlement, or proceed to manually settle the payment. With the matching results
UnmatchedorUnmatched, multiple results, the processing log (as saved in the Payment fieldMatching Records) may indicate troubleshooting information.- The message
No matching results foundindicates that none of the available matching configurations can extract data to be processed from the available bank statement items. That is, the (regular expression-based) input string filter provided as parser configuration does not retrieve data for the intended comparison from theReferencefield of the bank statement item. In this case, review the input string filter as part of the matching configuration. You can use tools like, for example, regex101 to define and test your regular expressions. - An applied matching configuration may return
"number-of-results" : 0for an entry match or account match. This indicates that the input string filter has extracted usable data from the bank statement item, but the data comparison with entries or accounts does not produce a result. In this case, review the processing log in the Payment fieldMatching Records. The recorded comparison data may indicate why the comparison has not found matching entries or accounts. If you are not able to find and correct the error, do not hesitate to contact JustOn Support.
For other matching and settlement results and their meaning, see Matching and Settlement Results.
- The message
Manually Settling Individual Entries
The manual settlement process allows users to associate unassigned payments to an account and to open entries, or re-associate payments to different open entries.
Typical use cases include:
- Assigning unmatched payments
- Finishing incomplete assignments
- Correcting wrong assignments
Info
Payments must be in the status Collected or Final for them to be assigned to entries.
The Settle Manually button will only be visible if the payment is in status Collected or Final.
Payments that have already been processed by the automatic settlement with payment matching but not assigned to entries are set to the matching result Unmatched.
JustOn Cash Management creates a payment record for each bank statement item when downloading bank data. The list views Unassigned Payments and Unassigned Payouts give direct access to the payments that have not been automatically assigned to entries and therefore need to be settled manually.
Managing Assignments
Assignments relate payments with entries.
- Open the relevant payment.
-
Click Settle Manually.
This opens the Edit Assignments dialog. The dialog displays a chart that shows the current use of the payment amount and allows you to
- modify the associated business entity
- modify the associated payment account
- assign one or multiple entries related to the payment account or to a different account
-
Optionally, select or modify the business entity.
You can only assign a payment to entries that are associated with the same business entity. Hence, changing the business entity deletes any current entry assignments, and selecting an entry will automatically set the related business entity if it was not set before.
-
Optionally, select or modify the payment account.
Use this option to reassign a payment to a different account.
Changing the account prompts you to decide how to handle the current entry assignments (if available): keep or delete them.
By default, the payment account will automatically be set with the first entry assignment. However, it can be changed if required.
-
Click + Assign Entry.
-
Select the target entry.
The account assigned to the payment may differ from the account assigned to the entry. If the entry account differs from the payment account, the assignment table will show the Entry Account column in addition.
-
Optionally, search and select the target entry account.
By default, this field is pre-filled with the current payment account.
-
Select the target entry.
There two options to do so:
-
On the tab Suggestions, you can select multiple entries from a list of suggested entries.
The tab shows the open and currently unassigned entries of the currently selected account. If there is currently no account selected, the tab shows the recently viewed entries.
-
On the tab Search Entry, you can search for an entry by its name.
You can only search for entries of the currently selected account.
-
-
-
Click Assign.
JustOn Cash Management automatically allocates as much money as available to the currently selected entries. If required, for example, when distributing one payment to multiple entries, you can later change the assigned amount.
This saves the assignment data.
-
Click Save, then Confirm.
This completes the settlement operation, associating the current payment with the selected entry, closes the dialog and returns you to the payment.
Modifying Assigned Amount
Modifying the assigned amount may be required when distributing one payment to multiple entries.
- Open the relevant payment.
-
Click Settle Manually.
This opens the Edit Assignments dialog. The dialog displays a chart that shows the current use of the payment amount and allows you to modify the amounts to assign to the selected entries.
-
Click in the row of the entry assignment you want to modify.
- In the
Amount to Assignfield, specify the amount to use. -
Click Apply.
This saves the assignment data.
-
Click Save, then Confirm.
This completes the settlement operation, changing the amount to assign to the selected entry, closes the dialog and returns you to the payment.