Integrating Payment Provider
← Setting Up Payments/Payouts Management
JustOn Cash Management can integrate your Salesforce org with payment service providers (PSP) in order to exchange payment information – namely, to provide your buyers the option to pay their purchases (represented as entries) via the payment page.
Administrators use Payment Provider records to configure and activate payment providers for business entities. The system then retrieves active configurations in order to interact with the PSPs.
The configuration holds both feature configurations like future payments and provider-specific data like access keys. The same PSP may be configured multiple times for a business entity, but you can create only one active payment provider setting per business entity and payment provider. Before creating a new setting for an entity/provider combination that already exists, you must deactivate the existing setting.
Configuring Payment Page Integrating Mollie Using JustOn Test Payments
Creating Payment Provider
To create a new payment provider configuration:
- Click to access the App Launcher, and select Setup Cash Management.
- Open the Payment Providers tab.
- Click New.
-
Specify the configuration details as necessary.
Field Description Name The name for this configuration record. Business Entity The business entity for which this PSP configuration is applicable. Type The payment service provider for which this configuration is applicable.
If the intended type is not available, you may have to add it to the picklist beforehand. -
Click Save.
This creates the new payment provider record.
Note that the PSP configuration is not functional until you specify the provider-specific data.
Configuring Payment Provider
Payment provider data involves
-
Provider-specific public data
PSP-specific public information like account IDs, hostnames, etc.
-
Provider-specific secret data
PSP-specific secret information like API keys, passwords, etc.
-
Payment token storage
Controls the option offered to users for saving their payment instrument.The available options include
Disabled,Explicit Consent,Explicit Opt-outandIndirect Consent.For details, see Payment Automation.
-
Payment provider activation
Enables/disables the PSP for payment users.
To modify payment provider data:
- Open the payment provider record you want to modify.
-
Click Configure Payment Provider.
-
Modify the provider-specific public information and secret information as necessary.
For details about individual payment provider integrations, see
-
Select the payment token storage option as necessary.
- Select (or deselect) the
Activecheckbox to enable (or disable) the payment provider.
-
-
Click Save.
This completes the screen flow, saving the specified information as required, and returns you to Payment Provider detail view.
Once the provider-specific data is complete, the PSP configuration is fully functional and available to payment users.
Deleting Payment Provider
Deleting a payment provider configuration removes the relevant payment provider from the system, together with the associated payment methods, saved secrets, etc.
To delete a payment provider:
- Open the Payment Providers tab.
-
Click and select Delete next to the payment provider record you want to delete.
This removes the complete payment provider configuration.
Enabling Payment Provider Types
To enable specific payment provider types, you may have to add the required Type values manually if you have upgraded JustOn Cash Management from an older version. To do so:
- Click to enter Setup, then navigate to the object management settings of the Payment Provider object.
- Click Fields & Relationships.
- Click the name of the
Typefield. -
In the Values section, click New.
Add the relevant payment provider, like
Mollie,JustonTestPayments, each in a new line.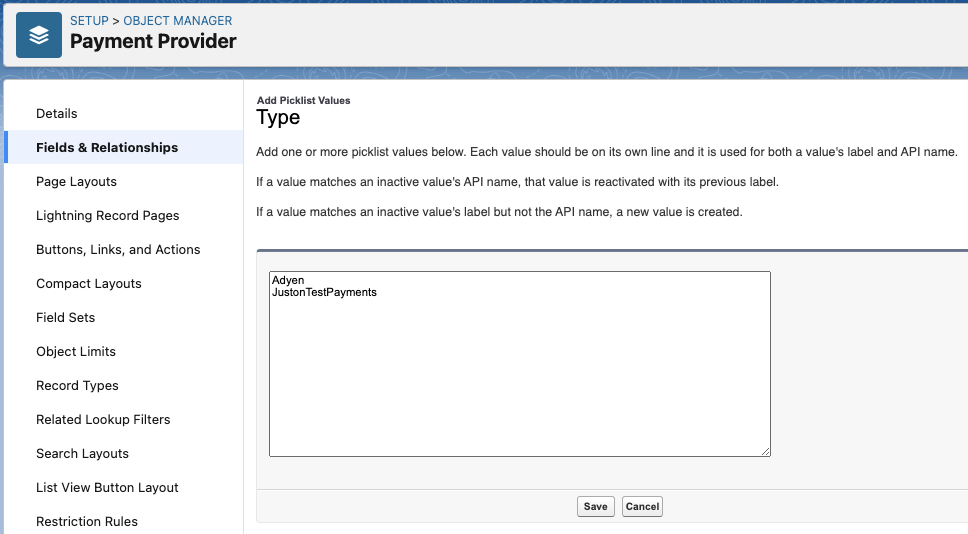
-
Click Save.
This saves the specified type values as required.
For details about modifying the values of picklist fields, see Add or Edit Picklist Values in the Salesforce Help.